Sunday, June 16, 2013

Birthday Club!!


We are starting up our birthday club again! Please email us with the following information to receive a special birthday announcement as well as a coupon to our online shop for the entire month of your pets birthday!
 
We will need:
Your Name, Pet(s) Name, and Pet(s) Birthday!
 
Send this information to:
 
or comment below and include your e-mail address!
 

Saturday, May 18, 2013

Sunday, May 12, 2013

Staying on top of the (fur)ball!


If you are behind the curve on your spring cleaning like me then you will love this blog. Last week we showed you how to get rid of the wet dog smell and this week we have a few more tips for making your life with pets easier.
 
We have a saying at our house: Home is where dog hair sticks to everything but the dog! If this is true in your house I think you will love these tips.
 
Here is a quick tip on how to quickly remove pet hair from your couches.
There are a few ways so you can take your pick depending on what you have around the house.
 
-by wiping a damp sponge on upholstery the hair will roll up for easy pick up. 
 
- use a set of rubber gloves or a shower squeegee and the rubber on either item will gather hair from couches or clothes when you rub them over the surface.
 
Now that you have all that extra fur up you can freshen the air with some homemade Febreze! Lets face it, with 2 dogs and 2 cats our house can get a little funky at times so we go through a lot of Febreze. This recipe is a great way to save money and still have your house smelling fresh.


If you are looking for a natural recipe try this one:
 
 
*side note* always test a small area before spraying onto upholstery, rugs or other household items.
 
 
Still looking for a way to freshen your home? Try adding some greenery! These dog friendly plants naturally filter the air. For more information please check out the Mother Nature Network. These plants are considered safe by the California Poison Control System:


SO, now that you have picked up all the extra fur, freshened the couches you still have a few places for lingering odors. The carpets being one of them. Instead of renting those expensive steam cleaners and using harsh chemicals try using this recipe to naturally freshen your carpets.


Friday, May 10, 2013

What's that smell?!


Hello from the rainy season in Japan. At our last two duty stations we have encountered a rainy season. This is a little more than April showers bring May flowers- it's more like days and days of rain for a period of several months.
 
The rainy season is great for hiding on the couch with coffee and a great movie but the Natives start to get restless after a while- the natives being my two very active golden retrievers. So after cabin fever sets in I eventually get my rain boots and grabbed an umbrella and we play in the rain.
 
 
It is all fun and games until you have two wet golden retrievers who want to come inside! So what do you do? I used to buy the sprays and deodorizers but they can add up pretty fast when you have two large dogs with a lot of fur. I was also encountering the problem where sometimes they would smell like wet dog wearing perfume and that was not a great combination!
So I did some research and some trial and error testing and this is what I found:
 
There are a few ways to freshen up a stinky dog between baths.
 
The first is a tried and true method.
 
Dryer Sheets: Simply wipe down the dog with a dryer sheet before they come back into your home. This works really well for the wet dog smell!
 
Here is another option if you want to stick to natural ingredients. It is a bit more involved but a lot cheaper and you get a pretty big batch out of it.

DIY Pet Wipes: You will need to fill a large bowl with hot water. I added about 50 ounces of hot water. Then, add in 1/4 cup apple cider vinegar  and 1 tablespoon of baking soda.  
Mix that all up and it will fizz a bit but not too much. That's it! As an additional option you can add essential oils for an extra fresh smell. I added about a tablespoon of lavender oil.


Next you will need to get some old cut up towels, rags, or old cut up shirts to be your "wipes."
 
If you would like a more disposable option you can 1/2 a paper towel roll with a sharp knife and use those as your wipes.
 
You will be using the same concept as baby wipe dispenser or a Clorox wipe dispenser. Find an old container such as an old Folgers coffee can, old butter dish, Clorox wipe can, Tupperware or even a Ziploc. You can fashion them into your wipe dispenser by cutting a hole in the lid, adding your towels, or paper towel roll into the container with a generous amount of your liquid. Just enough that the towels are damp and not soaking wet. If you are using old rags or shirts you can wash these and reuse them over and over again.
 
If you like you can even put the liquid in a spray bottle and dampen towels that way. I think it is just personal preference!
 
The last thing you need is a place to store the extra liquid. I used an old coffee creamer bottle. So once the wipes need to be replaced or dampened I can just pour some on them with the easy pour spout!


I jazzed up my wipes container a bit with some scrapbook paper so we would know these were for the puppies. I forgot to, but remember to write on your bottle of extra liquid so everyone knows what that is as well.
 

OK now for the test!!


Here is my wipe before......
 
and here is my wipe after.....
 That is pretty gross! You can actually see my hand print on there! I did not even do the whole dog. This was only about 10 seconds on my dogs back!
 
I think I will keep going!

 
So,  there you have it! Two inexpensive ways to freshen up Fido between baths or after a romp in the rain!


Tuesday, April 23, 2013

A Cause 4 Paws Donation Drive


As ya'll may know we are a military family and most of us will go to the end of the earth to support other military families. Recently I have been thinking of all the men and women overseas and all they do for us while fighting the war on terrorism. I was also thinking of all the 4 legged heroes that are fighting this war right alongside their human companions.
 
Military working dogs go above and beyond everyday to help ensure our freedom. They endure sandstorms, temperatures exceeding 100º F, rough terrain, dangerous situations, and many more unfathomable circumstances. I would like to say Thank You to our four legged heores with this donation drive. Giving to these heroes should not only be a "season" or certain time of year. Let us show them our support for their tireless efforts specially when these men, women and dogs serve every day of the year and not just around the gift giving season.
 
My small business, Southern Wag Pet Accessories, would like to invite you to support our 4 legged service members in our 1st annual a Cause 4 Paws donation drive. All donations will be sent overseas to working dogs who are in need of supplies, toys, and of course treats. I will provide a list below of items the handlers and their canine partners are in need of.
 
Please send all donations to:
 
Stephanie Caruthers
PSC 476 Box 678
FPO AP 96322-0007
 
We will be taking donations from 4/25/13 until 6/25/13. Please keep in mind we are overseas so priority flat rate boxes and first class mail are your two best options to send your donations.
 
 
Here is a list of items that have been specifically requested:
(please keep in mind the majority of the working dogs are medium, large and extra large) 
 
 
-Collapsible Nylon Water Bowls. An example would be something similar to this from Petco.
 
-Dog Treats. They do not have to be expensive treats keep in mind the quality of the items you are sending. For instance, try a few of these treats.
 
-Nylon or Leather Collars.
 
-Nylon or Leather Leashes in 3ft and 6ft lengths.
 
-Unscented Shampoo and wipes. Doctors Foster and Smith carry a great unscented shampoo. For times when water is not available they also require these unscented wipes.
 
-Ear Cleaner
 
-Eye Cleaner
 
-FURminator Brushes. FURminator brand brushes are the most requested by handlers.
 
-Kong Toys. Kong toys are highly requested by handlers. These toys provide stimulation for dogs during their down-time. This stimulation helps the dogs cope with PTDS, anxiety, as well as for training purposes.  
 
-Doggles. Another highly requested item. Doggles are essential during sand storms and other hazardous conditions.
 
-Pill Pockets. Greenies is a trusted brand for many professionals and veterinarians.


Please help us support those who put their lives on the line to ensure our safety and freedom. Continue to follow our blog to see our progress for collecting donations.
Every little bit helps!


Just some "fine print":
This is a charitable event being hosted by a military spouse. I am in no way associated with an organization and all donations should be given out of the kindness of the donors heart. I can not provide you with any "proof" for a tax deduction. Thank you for your support and understanding.
 

Wednesday, April 17, 2013

DIY Dog Bone Banner Tutorial


Ok yall, I have another great DIY project for you! Using burlap scraps I made a dog bone banner. You can use this banner idea for you 4 legged friends next birthday! If you are not big into celebrating their birthday you can always use it for puppy themed parties, adoption centers, or anything else you can think of. This was so simple to make and it was a lot of fun.
 
To get started this is what you will need:
Burlap
Twine
Acrylic Paint
Chalk
Iron
Paint Brush
Glue Gun
Scissors
Pins
Scrap Ribbon
 
 So my sister just got married and my Mom handmade all these beautiful burlap table cloths and she had a bunch of leftover scrap burlap laying around. So instead of throwing them away we found a great way to recycle the scraps into a great project.
 
We will be making a bone banner with my dogs name "Bailey" on it. You can put anything you want on the banner. It can say Woof, Ruff, Adopt, and if you are really ambitious you can make "Happy Birthday!"


First, you will need to get your scrap fabric and find good pieces you can cut your bones out of. My bones are about 8x10 but you can make them bigger or smaller. Once you find your pieces you will want to lay them out flat and iron them. This makes cutting out the bones A LOT easier. If you do not have any scraps of burlap you can buy some by the yard at your local fabric store.
 
Next, my mom free handed a dog bone out of some scrap paper we had laying around. We love to recycle around here! If you are not good at free handing a bone you can get a template online or use clip art in word and print one out.


Next, you will want to lay your pattern onto your burlap and pin it in place. I folded over one piece and will make two bones with one cut. If you do not feel comfortable with cutting two at once feel free to do one at a time.


You will want to have a good pair of scissors because the burlap moves a bit when you are cutting it. As you can see below my bones are not identical but they are close enough. Two down and four to go!

 
Ok! Once you get all your bones cut out you will want to lay them out and make sure they are all pretty even and trim any wonky edges.


Next, you will want to get your chalk and lightly trace your letters on the bones. Make sure to check your spacing on each bone.  You will want your letters to be about the same size on all the bones so it looks more cohesive. You can always just free hand it but we like to error on the side of caution.
 
 
Once you are happy with your letters you can get out your paint and paint brush and begin to trace over your chalk letters. Since the burlap has holes in between the weave we turned over a pizza box and painted on that to prevent from getting paint on the table.  


My Mom was a great helper!


They are DONE! Now that they are all done you will want to lay them all flat to dry. We used some more scrap paper to put under them to make sure the paint did not get on the counters. Drying time should take about 30 minutes depending on how thick your letters are.

 
After the bones are dry you will want to get out your twine to make your banner.
You can use ribbon, fabric, or any other trim but I thought this would work perfect and keep up with the rustic theme. I bought this particular twine at Hobby Lobby in the ribbon section.


Next, you will want to lay your bones face down and space them evenly. While you are doing this make sure you plugged in your glue gun so that sucker is nice and warm when we need it!
 
 
Once you get your spacing worked out you can use a small drop of hot glue to keep the twine in place. After the hot glue dries it is up to you on the finishing touches. I used some scrap ribbon I had and just tied it on the twine on each side of the bone. You can use whatever you like or just leave it the way it is. I just thought it needed a little something more.


When it's all done you will have the cutest personalized banner for your dog, kid, or event. It is super fast, fun and really cheap! Hope yall enjoy!


**I would like to add a special thanks to my Mom for all her help on this tutorial. I loved being back at home and crafting with her. Love you Mom!**

Friday, March 22, 2013

Drink Coaster Tutorial For Pet Lovers


Lets face it, between the Holidays, Birthdays, Anniversaries, and other special events gift giving has lost it's personal touch. I prefer making personalized gifts for friends and family and I feel like it means a lot more than something I picked up at Wally World or Target. It could also have something to do with the fact that I do not have a Wally Wold or Target anywhere near me but I digress--
So, here is a simple tutorial on a personalized gift for just about anyone. Keep in mind this does not have to be pet themed. You can personalize this for anyones intersts.
 
What you will need:
-4 tiles
-fancy paper cutter (or scissors and a ruler)
-scrapbook paper or a picture
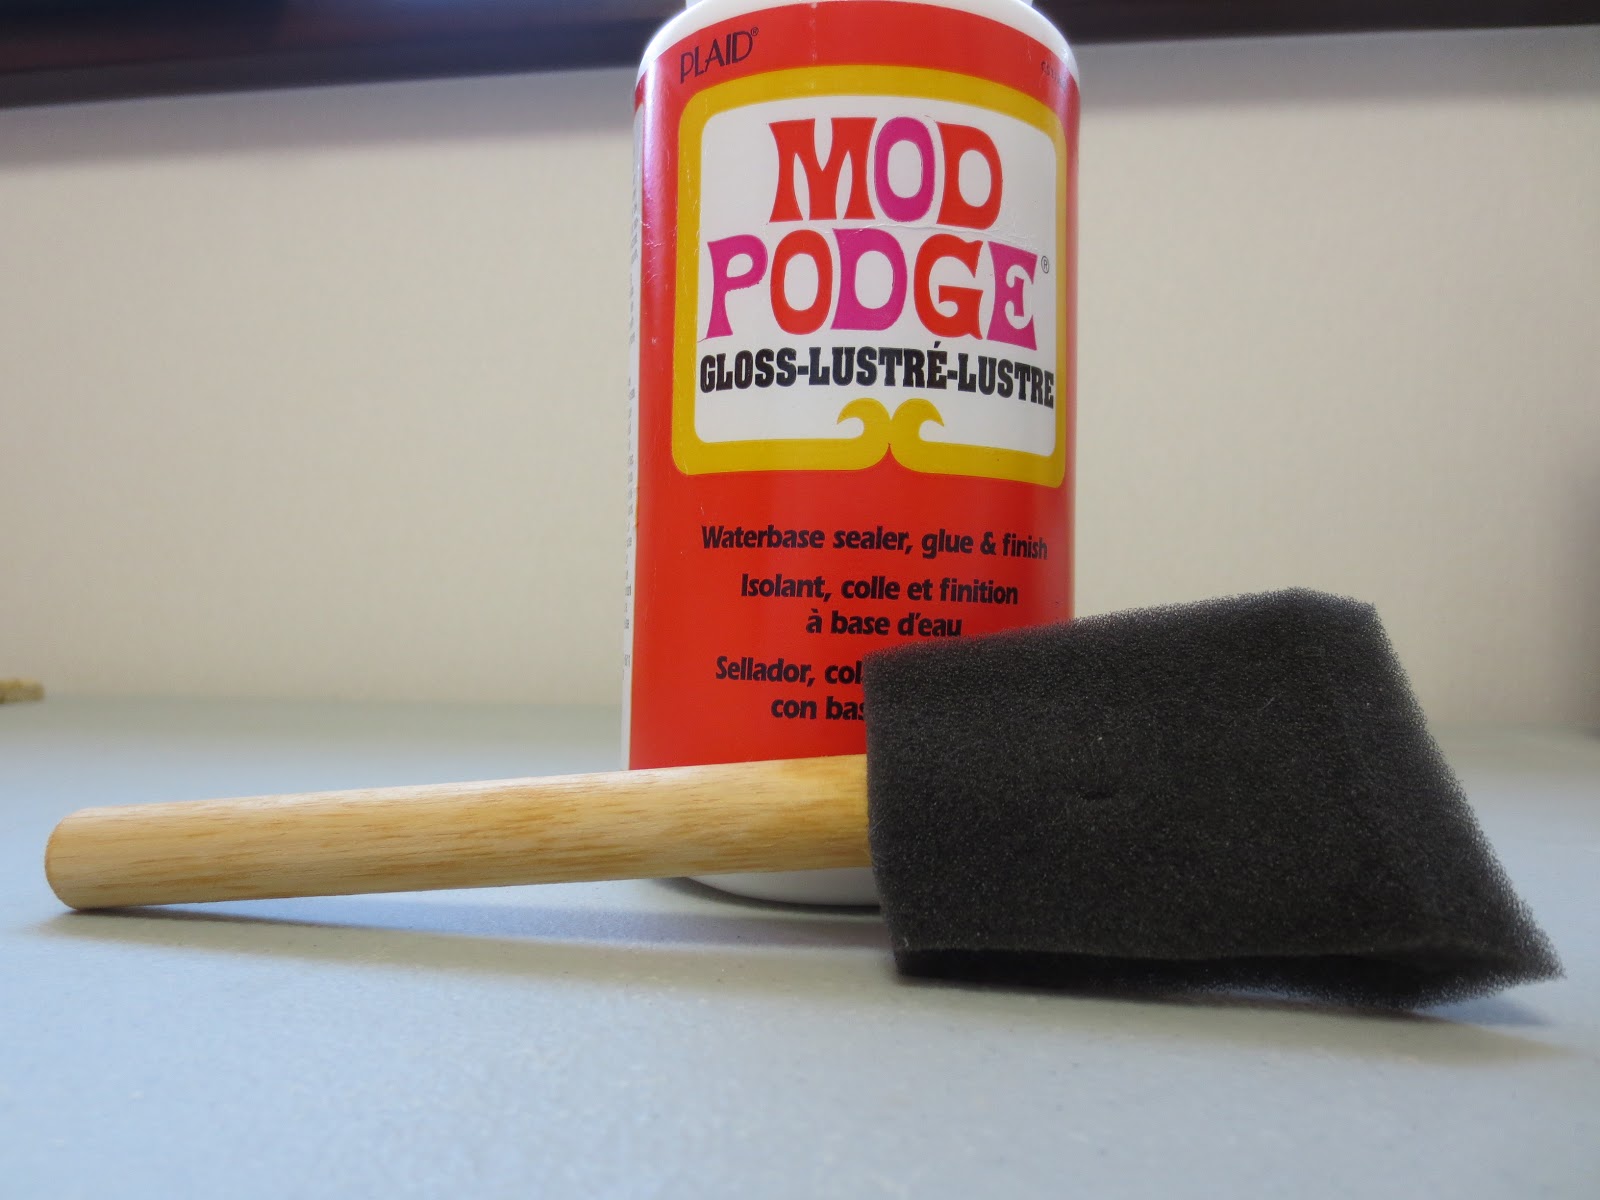
-mod podge
-diamond glaze
-2 small foam craft brushes
-toothpick or needle
 
To start out you will need to get your scrap book paper and cut it into 4 squares that are 3.5 inches by 3.5 inches. This is the perfect size for these tiles so it leaves a bit of the natural border and "frames" paper.
 
 
plain tile squares ready for decorating!


Paper is cut! 4 squares all 3 1/2 inches by 3 1/2 inches.
 
 
Just center your square and...Perfect!!
 
The next part is VERY IMPORTANT! The last time I made some of these I had "helpers" and these helpers were shedding their hair into my work space.
Before you mod podge make sure your area is clear of hair, fuzz and other small things. If the hair gets into the mod podge it makes a mess to get out or it will dry in there and look tacky. So... no 4 legged helpers on this project- sorry!
 
 
Now you will need to get out your Mod Podge and foam brush. Set one tile in front of you and put a thin layer of Mod Podge on the your tile and place the paper square in the center of it.
 
 
You will have to let each tile dry before moving to the next step so it is best to do one at a time and work in an assembly line fashion. Once all the glue is dry on each tile you can then put a thin layer of Mod Podge on each tile. Make sure to seal around the edges and make the Mod Podge as even as possible. 
 
 
When applying the Mod Podge it is best to make the coats thin. It will dry faster and it will decrease the possibility of soggy paper and air bubbles. If you do get air bubbles you can pop them with the end of a toothpick or the corner of your foam brush.
 
Once you have applied about 4 coats of Mod Podge on your coasters you will want them to dry completely and then you can apply your Diamond Glaze. You can check to see if they are dry by lightly touching a corner of the coaster. If it is tacky you will need to let it dry a little longer. I let mine sit for about an hour just to be on the safe side. Once the Mod Podge dries it is a matte finish so you can go a step further and use the Diamond Glaze to give a glossy finish to your coasters.
 
 
To start the diamond glaze process you will need to get a clean foam brush, Diamond Glaze and to lay all your coasters out. Make sure they are free of dust and fur! I pour a small amount of glaze (about 2 tablespoons) on a coaster and use the brush to spread it around in an even layer. Make sure the glaze coats the coaster on all edges.

As you can see below the Diamond Glaze sometimes gets air bubbles. You can use the edge of the brush to pop them or you can use the end of a toothpick or needle.


Once you have the glaze applied on all the coasters it is best to let them dry for about 24 hours. Set them somewhere where they will not be disturbed.
 
 
After they are dry you will need to apply the backing on each coaster. I am using felt stickers used for cabinets to keep them from slamming and scratching. You can also glue a felt square on the back. Basically anything to keep the stone coaster from scratching furniture or scratching each other when they are stacked together.
 
 
 Peel off the stickers and place a square in each corner.
 
 
 Now that you have added the backing they will be safe to stack on top of one another.


The last step is up to you! I added some decorative ribbon I found at the dollar store, but you can add solid ribbon or anything else you have around the house.


 And here you are! An affordable, personal gift for your pet loving friends!
 
Here are some more examples of coaster I have made. You can use different scrapbook paper, stamps, or even photos!
 
 
Here I used stamps and left the coasters natural and unfinished. The two below are with scrapbook paper and I used the same concept as the tutorial above.


Have Fun!!!