Friday, March 22, 2013

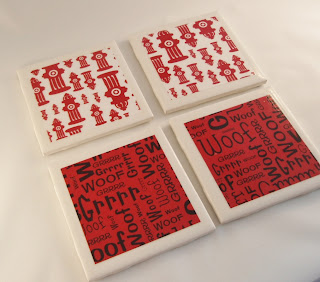
Drink Coaster Tutorial For Pet Lovers


Lets face it, between the Holidays, Birthdays, Anniversaries, and other special events gift giving has lost it's personal touch. I prefer making personalized gifts for friends and family and I feel like it means a lot more than something I picked up at Wally World or Target. It could also have something to do with the fact that I do not have a Wally Wold or Target anywhere near me but I digress--
So, here is a simple tutorial on a personalized gift for just about anyone. Keep in mind this does not have to be pet themed. You can personalize this for anyones intersts.
 
What you will need:
-4 tiles
-fancy paper cutter (or scissors and a ruler)
-scrapbook paper or a picture
-mod podge
-diamond glaze
-2 small foam craft brushes
-toothpick or needle
 
To start out you will need to get your scrap book paper and cut it into 4 squares that are 3.5 inches by 3.5 inches. This is the perfect size for these tiles so it leaves a bit of the natural border and "frames" paper.
 
 
plain tile squares ready for decorating!


Paper is cut! 4 squares all 3 1/2 inches by 3 1/2 inches.
 
 
Just center your square and...Perfect!!
 
The next part is VERY IMPORTANT! The last time I made some of these I had "helpers" and these helpers were shedding their hair into my work space.
Before you mod podge make sure your area is clear of hair, fuzz and other small things. If the hair gets into the mod podge it makes a mess to get out or it will dry in there and look tacky. So... no 4 legged helpers on this project- sorry!
 
 
Now you will need to get out your Mod Podge and foam brush. Set one tile in front of you and put a thin layer of Mod Podge on the your tile and place the paper square in the center of it.
 
 
You will have to let each tile dry before moving to the next step so it is best to do one at a time and work in an assembly line fashion. Once all the glue is dry on each tile you can then put a thin layer of Mod Podge on each tile. Make sure to seal around the edges and make the Mod Podge as even as possible. 
 
 
When applying the Mod Podge it is best to make the coats thin. It will dry faster and it will decrease the possibility of soggy paper and air bubbles. If you do get air bubbles you can pop them with the end of a toothpick or the corner of your foam brush.
 
Once you have applied about 4 coats of Mod Podge on your coasters you will want them to dry completely and then you can apply your Diamond Glaze. You can check to see if they are dry by lightly touching a corner of the coaster. If it is tacky you will need to let it dry a little longer. I let mine sit for about an hour just to be on the safe side. Once the Mod Podge dries it is a matte finish so you can go a step further and use the Diamond Glaze to give a glossy finish to your coasters.
 
 
To start the diamond glaze process you will need to get a clean foam brush, Diamond Glaze and to lay all your coasters out. Make sure they are free of dust and fur! I pour a small amount of glaze (about 2 tablespoons) on a coaster and use the brush to spread it around in an even layer. Make sure the glaze coats the coaster on all edges.

As you can see below the Diamond Glaze sometimes gets air bubbles. You can use the edge of the brush to pop them or you can use the end of a toothpick or needle.


Once you have the glaze applied on all the coasters it is best to let them dry for about 24 hours. Set them somewhere where they will not be disturbed.
 
 
After they are dry you will need to apply the backing on each coaster. I am using felt stickers used for cabinets to keep them from slamming and scratching. You can also glue a felt square on the back. Basically anything to keep the stone coaster from scratching furniture or scratching each other when they are stacked together.
 
 
 Peel off the stickers and place a square in each corner.
 
 
 Now that you have added the backing they will be safe to stack on top of one another.


The last step is up to you! I added some decorative ribbon I found at the dollar store, but you can add solid ribbon or anything else you have around the house.


 And here you are! An affordable, personal gift for your pet loving friends!
 
Here are some more examples of coaster I have made. You can use different scrapbook paper, stamps, or even photos!
 
 
Here I used stamps and left the coasters natural and unfinished. The two below are with scrapbook paper and I used the same concept as the tutorial above.


Have Fun!!!


Friday, February 22, 2013

Framed Paw Print Tutorial


I LOVE this idea! I am all about personalized artwork! This would be great as a gift as well! I have seen a few variations of this and figured I would give it a try for my puppies.
 
Here is what you will need:
-Picture Frame
-Scrapbook Paper
-Plain White Paper or Card stock
-Ink Pad
-Glue
-Printer or Marker
-Baby Wipes or Damp Towel
-Scissors
-and your pet of course!


You will first want to get everything ready and laid out ahead of time. I got everything together and went outside. I laid out the paper, ink pads and baby wipes. Side note on the ink pad: make sure you choose a non toxic, washable ink for this project .
 
Then it's time to wrangle up a willing volunteer! Hummm who to choose first?
 
 
I had my dog come outside and sit facing me. I had them "shake" and held onto their paw and blotted it onto the ink pad. If you do not think you dog will sit still you can have them lay down on their side and do the same.
 
 
From there, you will need to place your dogs paw firmly onto the paper. Make sure to apply pressure to all toes as well. As you can see my dogs have very furry feet so we got ink on their hair as well. After you have made you paw print you can try a few more until you find one you like best.
After you are done make sure to use your baby wipes to clean off your dogs foot.
As you can see some some were better than others! I chose the one on the right as my favorite!

 
The hardest part is over! Now it's time to get creative!
For the next part you can go into word and type up their names or you can free hand them on some extra paper or card stock. I do not have nice handwriting so I chose to use a cute font and cut out their names. You can use scissors and a fancy paper cutter like I have here.
 
 
Next, you will need to get your frame and decide on a design. Since I like in no-man-land we have little selection so I had to choose two separate frames. I wanted to put both of the paw prints together in one frame but they did not have any big enough at the store. So, we had to make due with what was available.
 
 
I chose two of these 5x7 frames. I wanted to dress them up a little more so I grabbed some scrapbook paper for the background and began to arrange the paw print, trim them down, and add the name tags I made in word.
You can fill the entire frame with the paw print if you like, or you can have a mat put around it. It all depends on you personal preference!
 
 
After a little cutting and creating this is what I came up with. The scrapbook paper is cut 5x7, the paw prints are cut 4x4 and the little name tags are cut 2x1 1/2.
 
 
For the next part you will need to glue it all together. I have some scrapbook glue I am going to use but you can use a glue stick, rubber cement or something to that nature.
 
 
Once you have everything all glued down you pop them into the frames!
Don't forget to clean the glass! (I forgot and they were very dirty!)


And here you go! A great way to remember your pet! Cheap, Fun and CUTE!

****Here is an update for our blog!****
Last time I was home I made these for my dad and his dogs. I used all the same materials and instructions as above I just added burlap to make it more personalized. I also used a paint brush and some black paint to write in the names.
What do you think?


Thanks for stopping by! See y'all next time!


Tuesday, February 12, 2013

Valentines Day Giveaway!!

We all know Valentines Day is around the corner so we decided to do something fun. We would like to host a contest from now until the day after Valentines Day!
 
I have a jar of Starburst candies and if you can guess the number of candies in this jar you will win a $25 Gift Card for Southern Wag Merchandise!
 
The closest guess without going over is the winner!


The not so fine print of the contest: Please make sure you are subscribed to our blog to be eligible to be a winner. How to become a follower is by scrolling down our page and on the left hand side you will see a blue button that says "Join this site."
Then you will follow the instructions prompted.
Once you are a follower you can then submit your guess at the bottom of this blog! Have fun and good luck!

Thursday, January 31, 2013

Paw Print Nail Art Tutorial


After living on Guam and in flip flops for three years this cold weather in Japan has kept me in closed toe shoes and all bundled up. We had a great day today at it was a high of 61! So I pulled off my socks and slippers for a good ole at home pedicure. I am by no means a professional but I wanted to do something for myself and having it done for FREE is the even better! So, if you are ready for some warm weather like I  am, here is a good way to free those piggy's and show some love for your four-legged friend! This would not only be cute for dogs and cats but for showing team spirit as well. There are plenty of cat mascots and you could just change up the colors to support your team!
 
You will need the following:
-Bobby Pin
-Scrap paper or a piece of cardboard like I used
-Nail Polish (2 contrasting colors)
-Clear Top Coat


First of all you want to start with painting your toes. While you are waiting for them to dry you can start practicing on your paw prints.
 
Here is what you need to do to start:
Get your piece of scrap paper or in my case a piece of the granola bar box that was in the recycling bin. Drop about a pea size amount of nail polish on the paper and get your bobby pin. You can straighten your bobby pin all the way or you can hold the two pieces apart like I am. I am using the longer of the two ends to dip into the white polish.


Hold your bobby pin up straight up and down so you get a uniform dot and just lightly touch the paper and your polish will transfer from the bobby pin onto the paper.
Go ahead and make one center dot and then two slightly above so you are making what looks like a Mickey Mouse head. You will need to re-dip your bobby pin for each dot.


1st step


2nd step


3rd step


Now that you have the pad made you need to make the toes. To make sure the toes are spaced right it is best to make a dot on each side of the pad first then make the two in the middle. This will help make sure it is even.
 
And that's it! Easy as pie! Now it's time to practice, practice, practice!
 
Practice makes perfect. You can see some are way better than others.Hopefully by now your toes are dry and you can get to work. You can use this paw print design on your toes and nails. Since I am going to do just one on by big toe I wanted to make the paw print a bit bigger so I am going to use something larger than a bobby pin.
Here is a wooden kabob skewer from in the kitchen. It has a round flat bottom that will make larger and perfect circles! GOOD LUCK!
 
Once you paw prints are dry go ahead and put a clear coat on them and that's it!!
 
And here is the finished product!
Taaa-Daahhhh!!
 
Here is another view on my other toe. I did a different paw print on this one. Which do you like better?


Saturday, January 26, 2013

Monday, December 31, 2012

2012 Holiday Pet Photo Contest!

And the winner is.....

 Congratulations to Toby and Kitty for winning our Swag Bag full of Southern Wag goodies! We are tailoring your prize pack just for you!
 
I would like to give an honorable mention to all of our contestants. I loved each and every photo submission. Please email us your mailing address because we would like to send prizes to y'all as well!
Royce
 

Rudder
 
 
 Indiana

Harley
 
 Sadie and Riley

Bonnie and Clyde
 
Thank you again for making this fun! Happy Holiday and Happy New Year!